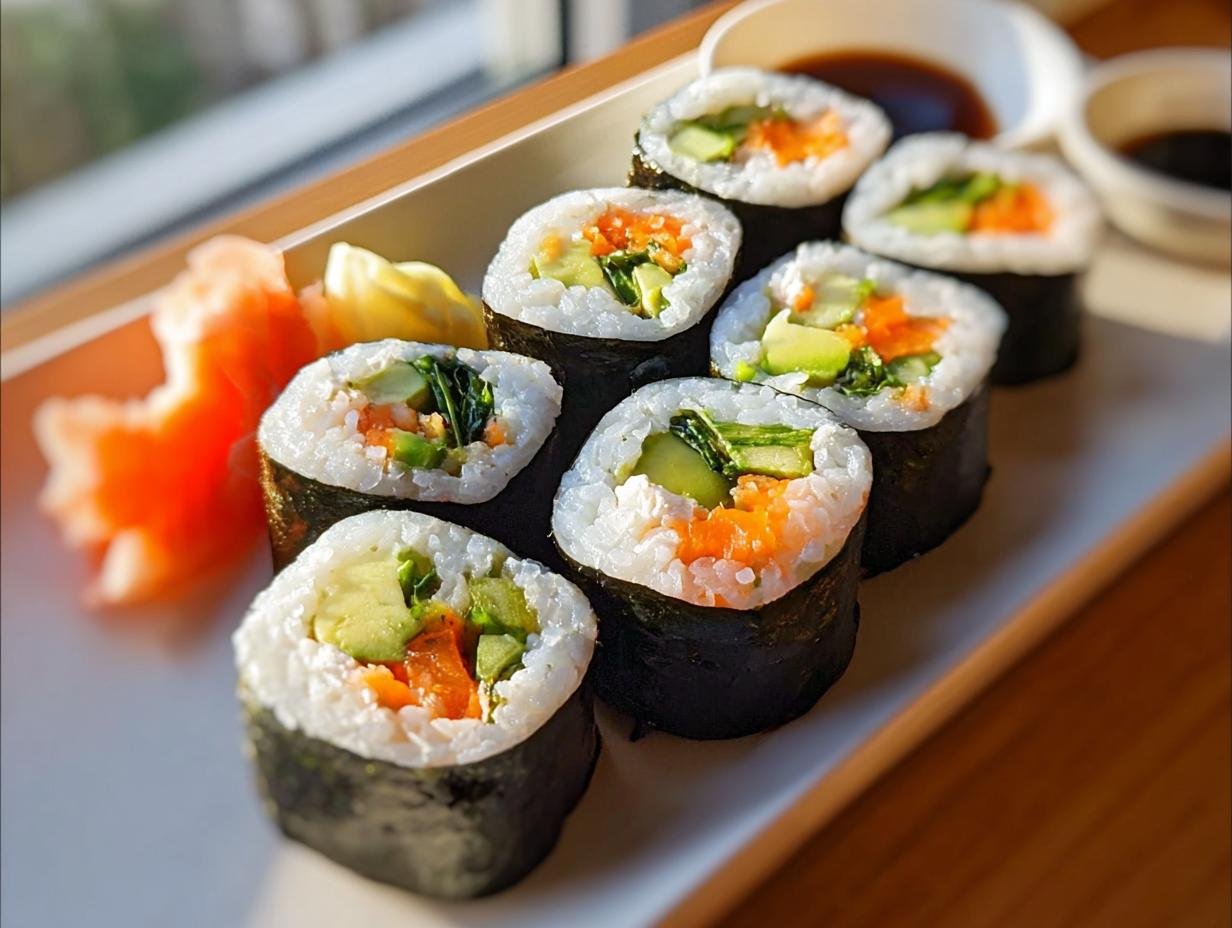
Sushi rolls have always felt like a special treat to me, something I’d only enjoy when dining out. But I’ve discovered that how to make sushi rolls at home is actually quite achievable, even for beginners! My first attempt was a bit messy, but the taste of fresh rice, crisp vegetables, and savory fillings was so rewarding. I remember the satisfying feeling of carefully spreading the rice and tucking in the fillings, then the gentle pressure as I rolled it all together. The vibrant colors and fresh aroma made it feel like a culinary adventure right in my own kitchen. These easy sushi roll recipes for beginners will have you creating beautiful, delicious sushi in no time. Let’s get cooking!
Why You’ll Love These Sushi Rolls
- Incredible fresh taste that rivals your favorite sushi restaurant.
- Surprisingly quick prep time, perfect for weeknight dinners.
- Packed with healthy ingredients; you’ll love the avocado sushi roll benefits like good fats and vitamins.
- A budget-friendly way to enjoy sushi without the restaurant markup.
- Fun for the whole family, especially when everyone customizes their own rolls – think of it as a build-your-own sushi bar!
- This recipe is a fantastic starting point, much like a classic California roll recipe.
- Impress your friends and family with your newfound homemade sushi skills.
- Versatile enough to adapt to any dietary needs or preferences.
Ingredients for Homemade Sushi Rolls
Gathering your supplies is the first fun step in learning how to make sushi rolls at home. You’ll need the perfect foundation: 2 cups sushi rice, cooked and seasoned. This sticky rice is crucial for holding everything together. For that authentic flavor, you’ll also need 6 sheets of nori (seaweed). When it comes to fillings, the possibilities are endless! We’ll use 1 medium cucumber, julienned, and 1 medium carrot, julienned for a nice crunch. Don’t forget 1 avocado, sliced for creamy richness – a star in many popular sushi dishes like the California roll recipe. For protein, I love using 8 oz imitation crab meat, flaked, but feel free to swap this out for cooked shrimp, firm tofu, or even some flaked cooked salmon for a delicious tuna sushi roll ingredients-inspired twist. These ingredients are key to following spicy salmon roll instructions too, as the base is very similar!
How to Make Sushi Rolls at Home
- Step 1: Start by cooking 2 cups sushi rice according to the package directions. While the rice is still warm, gently stir in the seasoning mixture: 2 tablespoons rice vinegar, 1 tablespoon sugar, and 1/2 teaspoon salt. Let this mixture cool down to room temperature; this seasoned rice is the heart of any good sushi roll.
- Step 2: Prepare your fillings. You’ll need to julienne 1 medium cucumber and 1 medium carrot for a fresh, crisp texture. Slice 1 avocado thinly to add that lovely creaminess. If you’re using imitation crab, flake 8 oz imitation crab meat. If you’re trying other variations, prepare your protein like cooked shrimp or tofu.
- Step 3: Set up your rolling station. Place a bamboo sushi mat on a clean, dry surface. It’s helpful to cover the mat with plastic wrap to keep it clean and prevent sticking – a great tip for mastering homemade sushi roll techniques. Lay one sheet of nori, shiny side down, onto the plastic-wrapped mat.
- Step 4: Dampen your hands with water to prevent the rice from sticking. Spread a thin, even layer of the seasoned sushi rice over the nori sheet, leaving about a 1-inch strip of nori uncovered at the top edge. This uncovered strip will help seal the roll.
- Step 5: Arrange your chosen fillings in a horizontal line across the bottom third of the rice-covered nori. Don’t overfill, as this can make rolling difficult and cause the nori to tear.
- Step 6: Now for the magic! Using the bamboo mat, carefully lift the edge closest to you and begin to roll the nori tightly over the fillings. Keep rolling, applying gentle, even pressure to create a compact cylinder. You’re learning how to roll sushi like a pro! Moisten the exposed nori strip with a little water to seal the roll securely.
- Step 7: Once rolled, place the sushi roll seam-side down. Using a very sharp, wet knife, slice the roll into 6–8 equal pieces. It’s important to wipe your knife clean with a damp cloth between each cut to ensure clean, distinct pieces.
- Step 8: Serve your beautiful homemade sushi rolls immediately with your favorite soy sauce, a bit of wasabi if you like a kick, and some pickled ginger to cleanse your palate between bites.
Pro Tips for the Best Sushi Rolls
I’ve spent a lot of time perfecting my sushi-making skills, and these little tricks really make a difference:
- Keep your hands and knife damp with water while working with the rice and cutting the rolls. This is a game-changer for preventing sticking and ensures clean cuts.
- Don’t overstuff your rolls! It’s tempting to add all your favorite ingredients, but too much filling makes rolling difficult and can cause the nori to tear.
- Chill your fillings slightly before you start. Cold ingredients are firmer and easier to manage when you’re trying to roll them tightly.
- A clean towel wrapped in plastic wrap can easily substitute for a bamboo sushi mat if you don’t have one.
What’s the secret to perfect sushi rolls?
The real secret to perfect sushi rolls is the rice and the rolling technique. Ensuring your rice is perfectly seasoned and cooled, and then using gentle, consistent pressure when rolling, is key to learning how to roll sushi like a pro.
Can I make sushi rolls ahead of time?
You can prepare the rice and chop your fillings a few hours in advance. However, it’s best to assemble and roll the sushi rolls just before serving for the freshest taste and texture. Refrigerate assembled rolls for up to 2-3 hours. For more information on food safety, you can refer to the FoodSafety.gov website.
How do I avoid common mistakes with sushi rolls?
Common pitfalls include using dry hands or a dull knife, which makes everything stick. Also, overfilling the rolls is a big one. Make sure your knife is sharp and wet, and pack fillings sparingly for the best results.
Best Ways to Serve Sushi Rolls
Once your beautiful sushi rolls are ready, it’s time to think about how to present them. Serving them with classic accompaniments elevates the entire experience. I love arranging them on a simple platter with small dishes of soy sauce, a dollop of wasabi, and some pickled ginger. Considering sushi roll platter ideas can really make your homemade creations shine, perhaps arranging them by color or filling type. Don’t forget the dipping sauces! Having a selection of the best sauces for sushi rolls, like a classic soy-ginger mix or a spicy mayo, adds another layer of flavor and customization that everyone enjoys. You can find great tips on plating and presentation on sites like Food Network.
Nutrition Facts for Sushi Rolls
Let’s talk about what goes into these delicious bites. Understanding the cucumber sushi roll nutrition helps make informed choices. Here’s a breakdown per serving (which is about one roll):
- Calories: 210
- Fat: 7g
- Saturated Fat: 1g
- Protein: 6g
- Carbohydrates: 32g
- Fiber: 3g
- Sugar: 3g
- Sodium: 340mg
Nutritional values are estimates and may vary based on specific ingredients used or how many sushi rolls you enjoy! For more detailed nutritional information, check out the USDA FoodData Central database.
How to Store and Reheat Sushi Rolls
Even though homemade sushi is best enjoyed fresh, I know life gets busy! If you have leftover sushi rolls, proper storage is key. Make sure they’ve cooled completely before packing. I like to place them in an airtight container, separating layers with parchment paper to prevent sticking. They’ll stay fresh in the refrigerator for about 3 to 4 days. Unfortunately, freezing isn’t ideal for sushi rolls as the rice texture changes significantly. While some people try to reheat them, I find it’s best to eat them cold or at room temperature directly from the fridge. This is a great approach if you’re meal prepping or planning a sushi platter ahead of time!
Frequently Asked Questions About Sushi Rolls
What are the different types of sushi rolls?
There are so many delicious variations! Beyond the basic maki (rolled sushi), you’ll find nigiri (fish over rice), sashimi (just fish), and temaki (hand rolls). Within maki, popular styles include the inside-out rolls like the California roll, where rice is on the outside, and futomaki, which are thicker rolls with multiple fillings. Exploring what are the different types of sushi rolls is part of the fun! You can learn more about these on sites like SushiFAQ.
What are the best sushi roll types for beginners?
For those just starting out, I always recommend sticking to simpler rolls. The California roll, with its cooked imitation crab, avocado, and cucumber, is a fantastic introduction. A simple cucumber roll or avocado roll are also great options. These tend to have fewer ingredients, making them easier to manage. The best sushi roll types for beginners are those that are forgiving and don’t require super-specialized ingredients.
Can I use different types of fish in my sushi rolls?
Absolutely! While tuna and salmon are incredibly popular, you can get creative with your fish choices. Cooked shrimp, smoked salmon, and even cooked crab meat work wonderfully. Just ensure any raw fish you use is sushi-grade and handled properly. I love experimenting with different flavor profiles, and using a variety of fish is a great way to discover new favorites, much like when preparing a Philadelphia roll recipe.
How do I make my sushi rolls look professional?
Achieving that restaurant-quality look comes down to a few key things. First, ensure your rice is evenly distributed and not too thick. Second, don’t overfill your rolls; this is crucial for a tight, uniform shape. Finally, use a very sharp, wet knife to slice the rolls, wiping it clean between each cut. Practicing homemade sushi roll techniques will definitely help you achieve that polished look.
Variations of Sushi Rolls You Can Try
Once you’ve mastered the basics of how to make sushi rolls at home, the fun really begins with exploring different variations! If you’re looking for great vegetarian sushi roll ideas, try filling your rolls with seasoned tofu, sweet potato, or shiitake mushrooms. For a richer, more indulgent experience, you might love a Philadelphia roll recipe, which typically features cream cheese, smoked salmon, and avocado. Another popular choice is the dragon roll sushi explanation – it’s usually an inside-out roll topped with thin slices of avocado that resemble dragon scales, often filled with tempura shrimp or crab. Experimenting with these different flavor profiles and techniques is what makes making sushi so exciting! For more inspiration, check out the Food & Wine recipe section.
Print
Sushi Rolls: 2 Amazing Tips
- Total Time: 45 minutes
- Yield: 6 rolls (2-3 servings) 1x
- Diet: Vegetarian
Description
Learn to make easy homemade sushi rolls with this beginner-friendly recipe. Customize with your favorite fillings for a delicious and fun sushi experience at home.
Ingredients
- 2 cups sushi rice, cooked and seasoned
- 6 sheets of nori (seaweed)
- 1 medium cucumber, julienned
- 1 medium carrot, julienned
- 1 avocado, sliced
- 8 oz imitation crab meat, flaked (or cooked shrimp, tofu, or smoked salmon)
- 2 tablespoons rice vinegar
- 1 tablespoon sugar
- 1/2 teaspoon salt
- Soy sauce, for dipping
- Pickled ginger, for serving (optional)
- Wasabi paste, optional
Instructions
- Cook 2 cups of sushi rice according to package instructions. While still warm, stir in 2 tablespoons rice vinegar, 1 tablespoon sugar, and 1/2 teaspoon salt. Let cool to room temperature.
- Julienne the cucumber and carrot, slice the avocado, and flake the crab meat or prep your protein of choice.
- Place a bamboo sushi mat on a clean surface and cover with plastic wrap. Lay a nori sheet shiny side down on the mat.
- With wet fingers, spread a thin layer of sushi rice over the nori, leaving a 1-inch strip uncovered at the top.
- Add your fillings in a horizontal line across the bottom third of the rice-covered sheet.
- Lift the edge of the mat and begin rolling tightly, keeping the fillings in place. Seal the edge with a bit of water.
- Using a wet, sharp knife, slice the roll into 6–8 pieces. Wipe the knife clean between each cut.
- Serve immediately with soy sauce, pickled ginger, and wasabi.
Notes
- Keep hands and knife damp to prevent sticking.
- Don’t overfill your rolls—it makes rolling harder and causes tearing.
- Chill your ingredients beforehand for easier rolling.
- Use seasoned rice for authentic sushi flavor.
- A clean towel wrapped in plastic wrap can substitute for a sushi mat.
- Prep Time: 30 minutes
- Cook Time: 15 minutes
- Category: Appetizer
- Method: No-Bake
- Cuisine: Japanese
Nutrition
- Serving Size: 1 roll
- Calories: 210
- Sugar: 3g
- Sodium: 340mg
- Fat: 7g
- Saturated Fat: 1g
- Unsaturated Fat: 5g
- Trans Fat: 0g
- Carbohydrates: 32g
- Fiber: 3g
- Protein: 6g
- Cholesterol: 15mg