Fried ice cream has always felt like a magical dessert, a delightful paradox of hot and cold, crispy and creamy. I remember the first time I tried it at a local fair – that warm, crunchy shell giving way to a shockingly cold, sweet ice cream center was pure bliss! Learning how to make this dessert at home seemed daunting, but I’ve discovered it’s surprisingly simple and incredibly rewarding. This easy fried ice cream recipe will guide you through creating that perfect contrast every time. Get ready to impress yourself and your loved ones with this show-stopping treat. Let’s get cooking!
Why You’ll Love This Fried Ice Cream
This recipe is a game-changer! Here’s why you’ll be making this dessert again and again:
- It’s incredibly satisfying to create a warm, crispy shell around a perfectly frozen center.
- The contrast in temperatures and textures is simply out of this world!
- Making homemade fried ice cream is easier than you think, perfect for any home cook.
- You can customize the coating with different spices or even crushed cookies.
- It’s the ultimate impressive dessert for parties or special occasions.
- This homemade fried ice cream recipe yields fantastic results every single time.
- It’s a fun activity to make with kids or friends.
- You’ll master a unique dessert that always wows guests.
Fried Ice Cream Coating Ingredients
Gathering the right fried ice cream ingredients is key to achieving that perfect crispy shell. You’ll need these simple items:
- 4 scoops Vanilla Ice Cream – make sure these are very firm, about 1 cup each.
- 2 cups Cornflakes, crushed – I like to crush mine in a zip-top bag with a rolling pin for a nice, even texture.
- 1 teaspoon Ground Cinnamon – this adds a lovely warmth and complements the sweetness.
- 1 cup Granulated Sugar – this helps create a golden, crunchy coating.
- 2 large Eggs – these act as the binder for our coating.
- Oil for frying (canola or vegetable oil recommended) – you’ll need enough to submerge the ice cream balls.
The combination of cornflakes, sugar, and cinnamon creates our signature fried ice cream coating. These ingredients toast up beautifully in the hot oil, giving you that satisfying crunch.
How to Make Fried Ice Cream
Now for the fun part – learning how to make fried ice cream! It’s all about getting that perfect balance of super cold ice cream and a hot, crispy coating. Don’t worry if your first few aren’t perfect; the taste will still be amazing!
- Step 1: Start by scooping your vanilla ice cream into perfectly round balls. I like to use a cookie scoop for consistency. Place these on a baking sheet lined with parchment paper and freeze them for at least 2 hours, or until they are rock solid. This is the most crucial step to ensure your fried ice cream doesn’t melt.
- Step 2: While the ice cream is freezing, prepare your coating. In one bowl, whisk together the crushed cornflakes, cinnamon, and granulated sugar. This mixture will give us that delicious, sweet crunch.
- Step 3: In a separate bowl, beat the two large eggs until they’re nice and frothy. This will help the cornflake mixture stick to the ice cream.
- Step 4: Working quickly, take one frozen ice cream ball and dip it into the beaten egg, making sure it’s fully coated.
- Step 5: Immediately roll the egg-coated ice cream ball in the cornflake mixture, pressing gently to ensure an even coating. For an extra thick and crispy crust, you can dip and roll it a second time. Once coated, place it back on the parchment-lined baking sheet and freeze for another hour. This second freeze is key for a truly crispy fried ice cream.
- Step 6: When you’re ready to fry, heat about 2-3 inches of oil in a deep, heavy-bottomed pot or Dutch oven to 375°F (190°C). Using a thermometer is best for accuracy.
- Step 7: Carefully lower each ice cream ball into the hot oil, frying only one or two at a time to avoid crowding the pot and dropping the oil temperature. Fry for just 10-15 seconds, until the coating is beautifully golden brown.
- Step 8: Quickly remove the fried ice cream from the oil using a slotted spoon and place it on a plate lined with paper towels to drain any excess oil.
- Step 9: Serve your amazing homemade fried ice cream immediately while the outside is still warm and crisp, and the inside is perfectly cold and creamy!
Pro Tips for the Best Fried Ice Cream
Want to ensure your fried ice cream turns out perfectly every time? I’ve picked up a few tricks that make all the difference:
- Always double-coat your ice cream balls – dip in egg, then coating, then egg again, then coating again. This extra layer creates a more robust shell.
- Make sure your oil is at the correct temperature before frying. Too cool, and the ice cream melts; too hot, and the coating burns before the inside is even slightly warmed.
- Work in small batches! Overcrowding the pot will drastically lower the oil temperature, leading to soggy coatings.
- Freeze, freeze, freeze! The firmer the ice cream balls are, the better your chances of success. Don’t rush this step.
What’s the secret to perfectly crispy fried ice cream?
The key to that shatteringly crispy fried ice cream shell is twofold: ensure your ice cream balls are rock solid before frying, and don’t overcrowd the pot. Maintain a consistent oil temperature of 375°F (190°C) and fry for only 10-15 seconds. For more tips on achieving perfect textures, check out this guide on homemade ice cream recipes.
Can I make fried ice cream balls ahead of time?
Yes, absolutely! Once you’ve coated your ice cream balls (and done the optional second coating), place them back on the parchment-lined baking sheet and freeze them until solid. You can then transfer them to an airtight container or freezer bag. They’ll keep well in the freezer for up to 2 weeks before you’re ready to fry.
How do I avoid common mistakes with homemade fried ice cream?
The biggest mistake is not freezing the ice cream balls long enough. They need to be rock solid! Another common pitfall is frying too many at once, which lowers the oil temperature and leads to melting. Always fry in small batches to keep that oil hot and the coating crisp. Learning about proper cooking temperatures can be helpful, as discussed in breakfast bowl recipes with eggs, where temperature control is also key.
Best Ways to Serve Fried Ice Cream
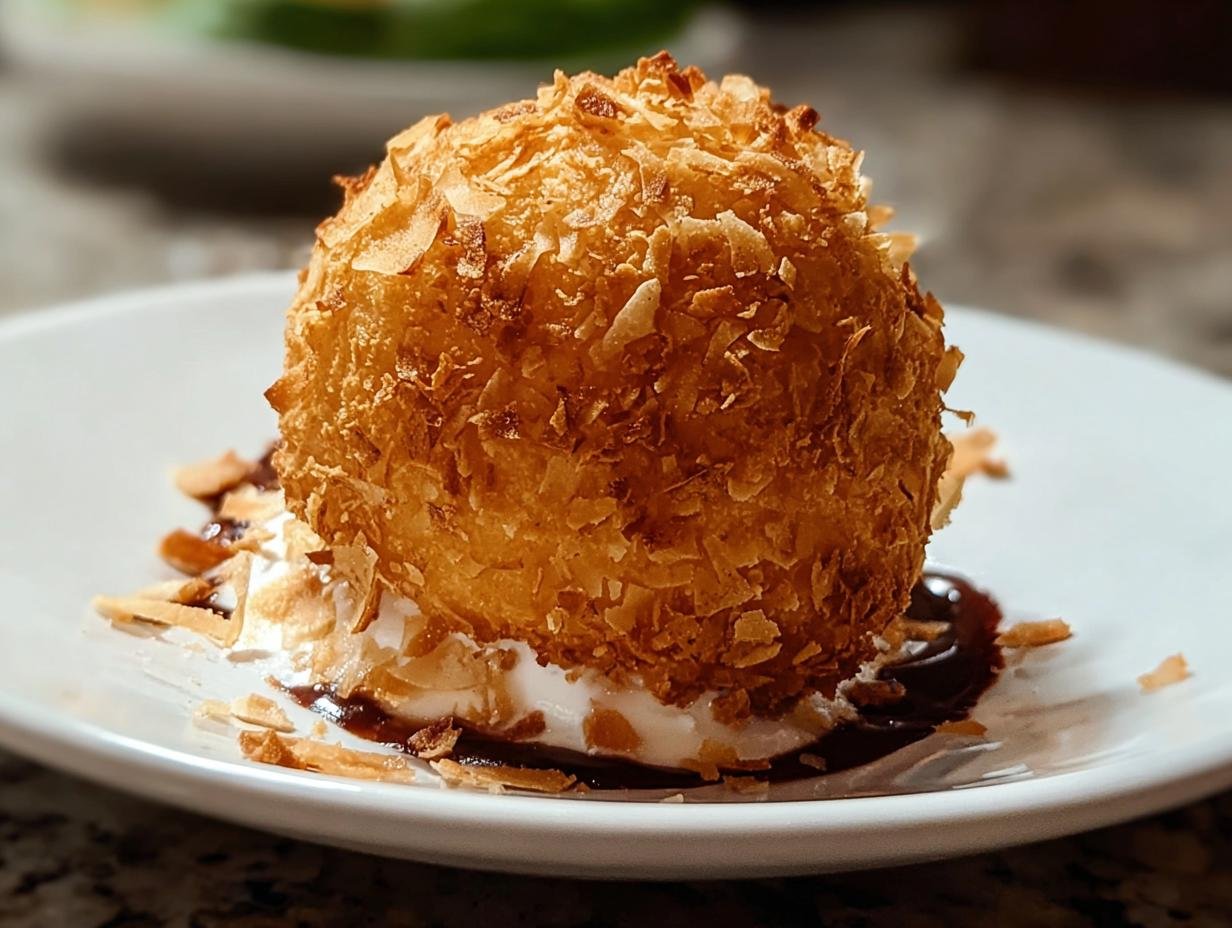
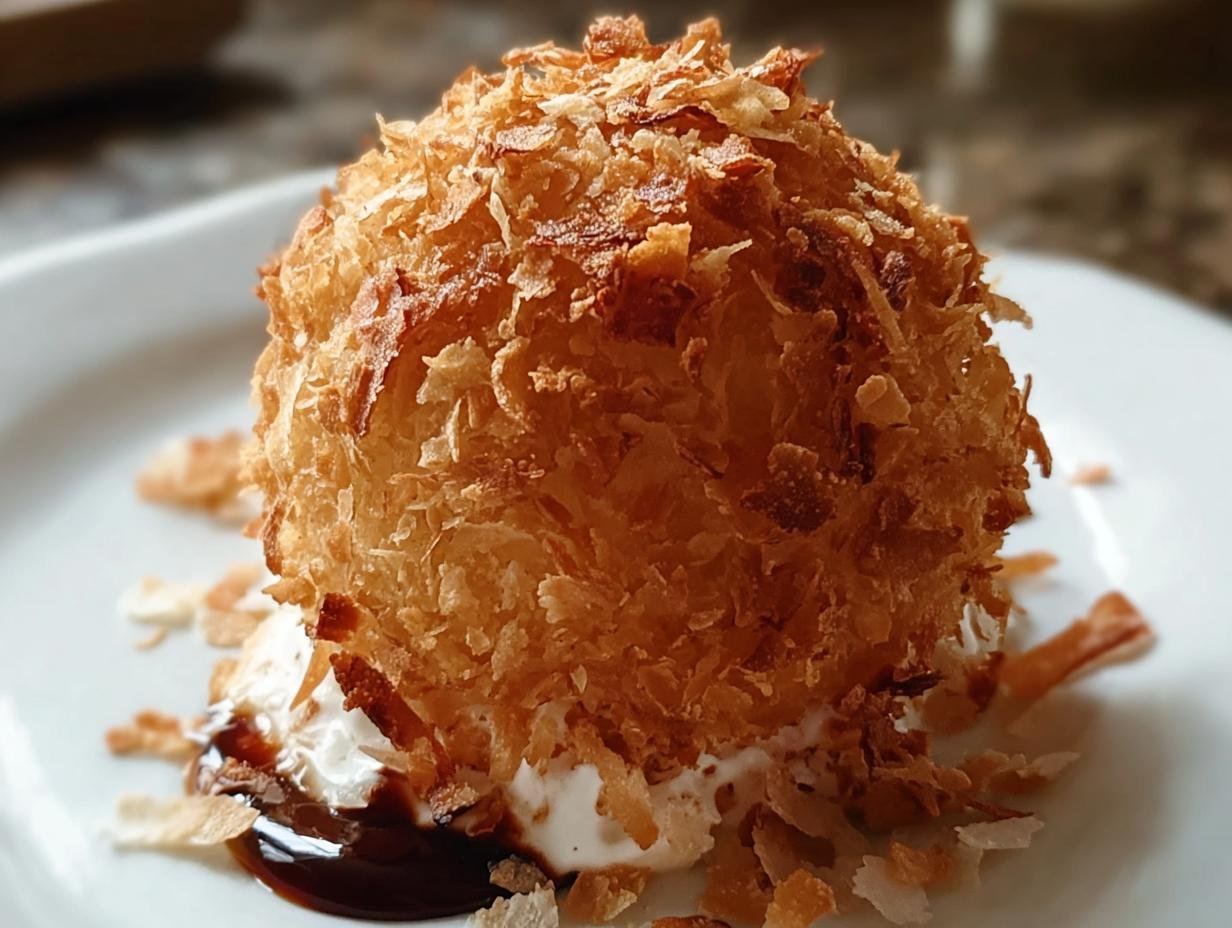
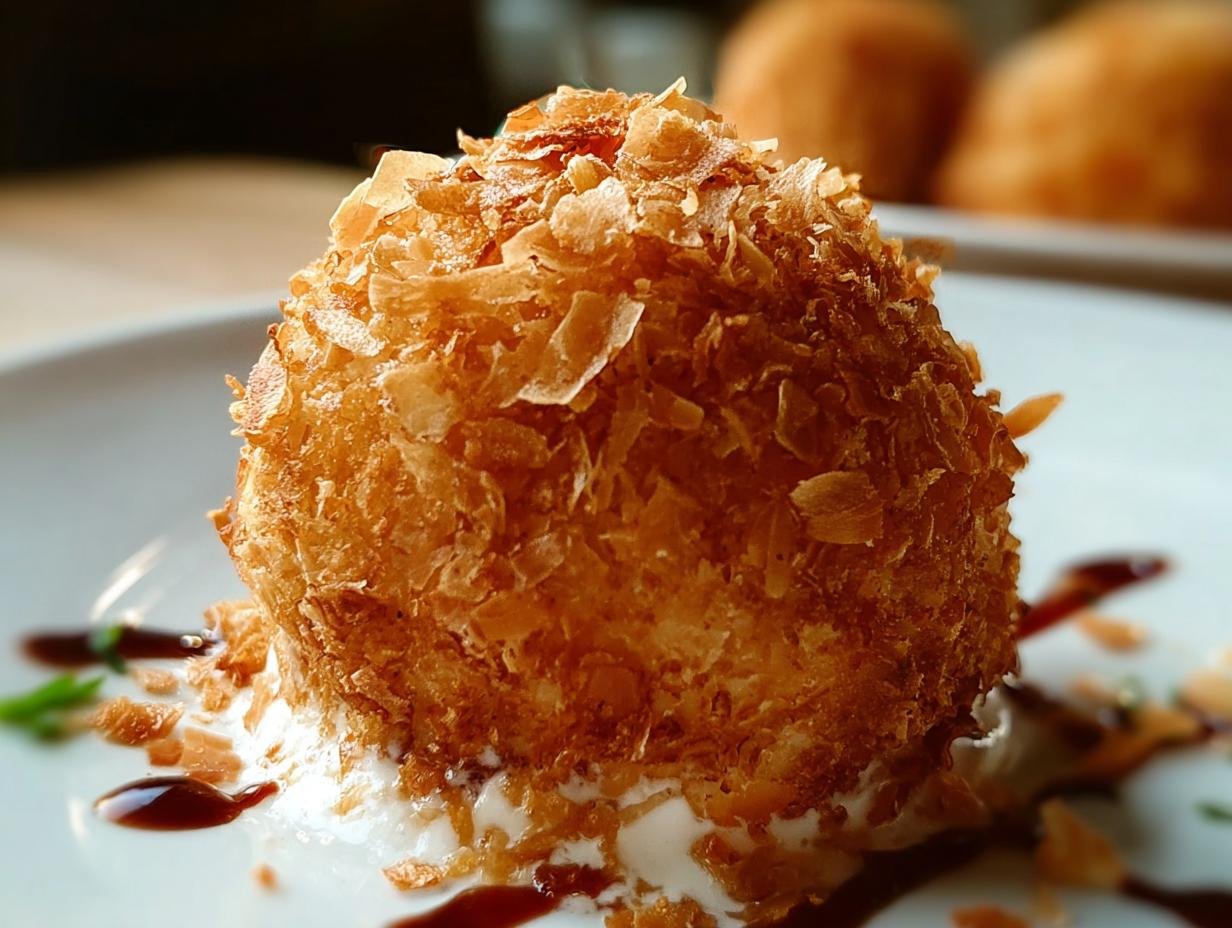
Once you’ve mastered how to make fried ice cream, the serving possibilities are endless! I love keeping it classic with a dollop of whipped cream and a drizzle of rich chocolate syrup. For a truly sweet fried ice cream experience, a sprinkle of toasted coconut flakes or some colorful sprinkles adds a fun touch that kids adore. If you’re feeling adventurous, try pairing it with a warm fruit compote, like cinnamon-spiced apples or tart berries, for a delightful contrast. A small side of Mexican cinnamon sugar churros is also a fantastic companion, making it a truly decadent dessert spread. For other delightful dessert ideas, explore our desserts category.
Fried Ice Cream Nutrition Facts
Understanding the nutritional breakdown of this delightful dessert can help you enjoy it mindfully. Here’s an approximate guide per serving of our fried ice cream:
- Calories: 300 kcal
- Fat: 15 g
- Saturated Fat: 8 g
- Protein: 3 g
- Carbohydrates: 40 g
- Fiber: 1 g
- Sugar: 20 g
- Sodium: 200 mg
Nutritional values are estimates and may vary based on specific ingredients and portion sizes used.
How to Store and Reheat Fried Ice Cream
Knowing how to properly store and reheat your delicious fried ice cream is key to enjoying its magic later. If you happen to have any leftovers (which is rare in my house!), let them cool completely on a wire rack for about 10-15 minutes. Once cooled, you can store them in an airtight container. For short-term storage, keep them in the refrigerator for up to 3-4 days. They’ll still be tasty, though the coating might lose a bit of its initial crispiness.
For longer storage-related secondary keyword preservation, freezing is your best bet. Place the cooled fried ice cream balls in a single layer on a parchment-lined baking sheet and freeze until solid, then transfer them to a freezer-safe airtight container or a heavy-duty freezer bag. They can stay frozen for up to 3 months. When you’re ready to reheat, I’ve found the best method is a quick 30-60 second blast in a hot oven (around 400°F or 200°C) or an air fryer just to crisp up the coating again. Avoid the microwave, as it will make the coating soggy. For more baking tips, consider looking into baby lemon impossible pies recipe, which often involves precise baking temperatures.
Frequently Asked Questions About Fried Ice Cream
Can I use different flavors of ice cream for this fried ice cream recipe?
Absolutely! While vanilla is classic, feel free to experiment with your favorite ice cream flavors. Chocolate, strawberry, or even mint chocolate chip work wonderfully. Just ensure the ice cream is very firm before coating and frying to prevent melting. The key to a successful fried ice cream recipe lies in that frozen center!
What’s the best oil to use for deep frying?
For the best results, I recommend using a neutral oil with a high smoke point, like canola, vegetable, or peanut oil. These oils are great for achieving a crispy coating without imparting their own strong flavor. Make sure you have enough oil in your pot to fully submerge the ice cream balls – usually about 2-3 inches deep. Understanding oil properties is crucial for deep frying, similar to how understanding ingredient properties is vital for dishes like cheesy scalloped potatoes.
How do I get a really thick crust on my fried ice cream?
To achieve a thicker, extra-crunchy crust, simply repeat the coating process! After the first dip in egg and then the cornflake mixture, dip it again in egg and then roll it in the coating mixture once more. Freezing it for an additional hour after the double coating will ensure it holds up beautifully during frying.
Can I bake fried ice cream instead of deep frying?
While deep frying gives you that signature crispiness, you can try baking it. Place the coated ice cream balls on a parchment-lined baking sheet and bake at a high temperature, around 400°F (200°C), for just a few minutes until the coating is golden. It won’t be quite the same as deep-fried, but it’s a lighter option! For other lighter options, explore our power bowl bliss veggie glow up edition.
Variations of Fried Ice Cream You Can Try
Once you’ve mastered the classic fried ice cream, don’t be afraid to get creative! There are so many fun ways to adapt this beloved dessert. For a taste of authentic flavor, you absolutely must try a Mexican fried ice cream recipe. This often involves coating the ice cream in cinnamon sugar and crushed tortilla chips or crushed graham crackers for a delightful crunch and a hint of spice. If you’re looking for dietary options, a vegan version is easy to make by using dairy-free ice cream and a flax egg or aquafaba for the coating binder. For a gluten-free treat, swap the cornflakes for crushed gluten-free cereal, crushed nuts like almonds or pecans, or even gluten-free pretzels. You might also enjoy our cranberry feta pinwheels with cream cheese for another unique flavor combination.

Fried Ice Cream: 1 Amazingly Crispy Treat
- Total Time: 3 hours 15 minutes
- Yield: 4 servings 1x
- Diet: Vegetarian
Description
Learn how to make delicious fried ice cream at home. This recipe guides you through creating a warm, crispy shell that perfectly encases a cold, creamy ice cream center, offering a delightful contrast in textures and temperatures. Customize with your favorite flavors and toppings for a truly unique dessert experience.
Ingredients
- 4 scoops Vanilla Ice Cream
- 2 cups Cornflakes, crushed
- 1 teaspoon Ground Cinnamon
- 1 cup Granulated Sugar
- 2 large Eggs
- Oil for frying (canola or vegetable oil recommended)
- Optional Garnishes: Whipped Cream, Chocolate Syrup, Maraschino Cherries
Instructions
- Scoop vanilla ice cream into equal-sized balls and place them on a baking sheet. Freeze for at least 2 hours until firm.
- In a mixing bowl, combine crushed cornflakes, ground cinnamon, and granulated sugar.
- In another bowl, beat the eggs until frothy.
- Dip each frozen ice cream ball into the beaten eggs, ensuring full coverage.
- Roll the coated ice cream ball in the cornflake mixture. For a thicker coating, repeat the egg dip and cornflake roll, then freeze again for 1 hour.
- Heat oil in a deep pot to 375°F (190°C).
- Carefully drop each ice cream ball into the hot oil and fry for 10-15 seconds until golden brown.
- Remove the fried ice cream from the oil and drain on paper towels.
- Serve immediately with optional garnishes like whipped cream, chocolate syrup, or maraschino cherries.
Notes
- Store un-fried, coated ice cream balls in an airtight container in the freezer for up to 2 weeks.
- Fried ice cream is best enjoyed immediately after preparation.
- For a gluten-free version, use gluten-free cornflakes or crushed nuts.
- For a vegan version, use dairy-free ice cream and a plant-based egg substitute for coating.
- Ensure ice cream balls are very firm before frying to prevent melting.
- Fry in small batches to maintain oil temperature.
- Prep Time: 2 hours
- Cook Time: 15 minutes
- Category: Desserts
- Method: Deep Frying
- Cuisine: American
Nutrition
- Serving Size: 1 serving
- Calories: 300 kcal
- Sugar: 20 g
- Sodium: 200 mg
- Fat: 15 g
- Saturated Fat: 8 g
- Unsaturated Fat: 6 g
- Trans Fat: 0 g
- Carbohydrates: 40 g
- Fiber: 1 g
- Protein: 3 g
- Cholesterol: 100 mg