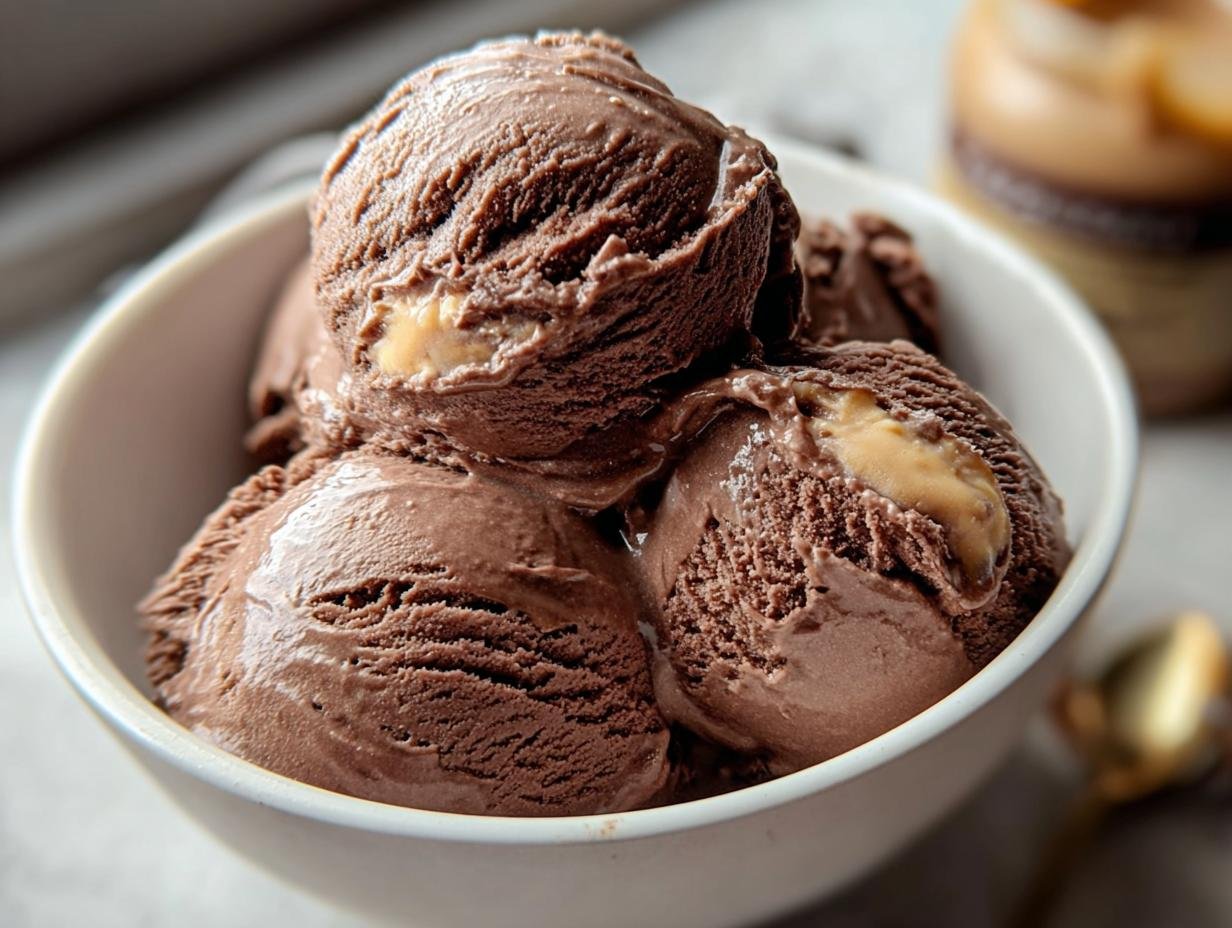
Chocolate peanut butter ice cream has always been my ultimate comfort food, a perfect marriage of rich, deep chocolate and creamy, salty peanut butter. I remember the first time I tried making it from scratch – the anticipation as the sweet, nutty aroma filled my kitchen was almost as good as the first bite. This easy chocolate peanut butter ice cream recipe is a game-changer, turning a simple craving into a decadent, homemade delight. You’ll be amazed at how simple it is to whip up this incredible homemade chocolate peanut butter ice cream that rivals any store-bought tub. Let’s get cooking!
Why You’ll Love This Chocolate Peanut Butter Ice Cream
This recipe is a winner for so many reasons! Get ready to fall in love:
- The flavor combination is pure bliss – a perfect balance of rich chocolate and creamy peanut butter.
- It’s incredibly easy chocolate peanut butter ice cream to make, even for beginner cooks.
- With minimal prep, you can whip up this decadent treat in under 20 minutes.
- It’s a budget-friendly way to enjoy a gourmet dessert at home.
- Guaranteed to be a hit with the whole family – picky eaters included!
- This easy chocolate peanut butter ice cream is perfect for special occasions or just a Tuesday night treat.
- You control the ingredients, making it a healthier alternative to store-bought options.
- The creamy texture is absolutely divine, making every spoonful a delight.
Ingredients for Homemade Chocolate Peanut Butter Ice Cream
Gathering these simple chocolate peanut butter ice cream ingredients is the first step to pure dessert happiness. I love how few items are needed for such an amazing result!
- 2 cups heavy cream – This is the base for our creamy texture; make sure it’s cold!
- 1 can (14 oz) sweetened condensed milk – This provides sweetness and helps create that smooth, no-churn consistency without ice crystals.
- 1/2 cup cocoa powder – Use a good quality unsweetened cocoa powder for that deep chocolate flavor.
- 1/2 cup peanut butter, melted – I prefer a creamy, natural peanut butter, but any kind will work. Melting it makes it easier to swirl in.
How to Make Chocolate Peanut Butter Ice Cream
Whipping up this dreamy dessert is easier than you think! This chocolate peanut butter ice cream no churn recipe means you don’t even need a fancy machine.
- Step 1: Prepare Your Cocoa Mixture: Grab a medium saucepan. Combine 2 cups heavy cream and 1/2 cup cocoa powder. Stir gently over medium-low heat for about 5 minutes. You want it to become smooth and wonderfully chocolatey, with a rich aroma filling your kitchen.
- Step 2: Add Sweetened Condensed Milk: Slowly whisk in one can (14 oz) of sweetened condensed milk into your warm cocoa blend. Keep whisking until everything is completely combined and looks glossy.
- Step 3: Incorporate Melted Peanut Butter: Now for the peanut butter! Gently whisk in 1/2 cup of melted peanut butter. I like to melt mine in the microwave for about 30 seconds. Continue whisking until it blends seamlessly into the chocolate mixture, creating that signature flavor.
- Step 4: Chill the Mixture: Remove the saucepan from the heat. Let this glorious mixture cool down completely. I usually transfer it to a bowl and then refrigerate it for at least 4-5 hours, or even overnight. This chilling step is crucial for the perfect texture in our chocolate peanut butter ice cream no churn creation.
- Step 5: Churn That Ice Cream: While this recipe is no-churn, I highly recommend using an ice cream maker for the best texture. Pour your well-chilled mixture into your ice cream maker. Churn it according to the manufacturer’s instructions, usually about 20-30 minutes, until it reaches a soft-serve consistency.
- Step 6: Freeze and Savor: Transfer the churned ice cream into a freezer-safe container. If you want extra swirls or chunks of peanut butter or chocolate, now’s the time to add them! Seal the container tightly and freeze for at least 3 hours. This allows the chocolate peanut butter ice cream to firm up perfectly.
Pro Tips for the Best Chocolate Peanut Butter Ice Cream
Want to elevate your homemade ice cream game? I’ve picked up a few tricks that make this chocolate peanut butter ice cream absolutely divine!
- For an intensely rich chocolate flavor, try toasting your cocoa powder lightly in a dry pan for a minute before adding it to the cream. It really wakes up the chocolate notes!
- Make sure your heavy cream and mixing bowl are super cold. This helps the cream whip up faster and achieve that perfect, airy texture.
- Don’t overmix the sweetened condensed milk and peanut butter into the chocolate base. Gently folding them in preserves the lightness.
- If you don’t have an ice cream maker, you can still make this chocolate peanut butter ice cream no churn by pouring the mixture into a freezer-safe container and stirring vigorously every 30-45 minutes for the first 3-4 hours to break up ice crystals.
What’s the secret to perfect Creamy Chocolate Peanut Butter Ice Cream?
The magic lies in the combination of heavy cream and sweetened condensed milk. This duo creates an incredibly smooth, creamy texture without needing an ice cream maker. For an even more rich chocolate peanut butter ice cream, ensure your peanut butter is melted and fully incorporated. For more homemade dessert inspiration, check out our homemade ice cream recipe.
Can I make Chocolate Peanut Butter Ice Cream ahead of time?
Absolutely! This is a fantastic make-ahead dessert. You can prepare the base mixture and chill it in the refrigerator for up to 24 hours before churning. Once churned, it will keep in the freezer for about 3 months. Just remember to press plastic wrap directly onto the surface to prevent ice crystals.
How do I avoid common mistakes with Chocolate Peanut Butter Ice Cream?
The biggest pitfall is not chilling the base mixture thoroughly before churning; this can lead to iciness. Also, resist the urge to overmix after adding the condensed milk and peanut butter, as this can make the final product too dense. Finally, be sure to store it in an airtight container to prevent freezer odors. For other delicious dessert ideas, explore our desserts category.
Best Ways to Serve Chocolate Peanut Butter Ice Cream
This decadent ice cream is fantastic on its own, but I love dressing it up a bit! For a truly spectacular dessert, try serving a generous scoop alongside a warm, fudgy brownie. The contrast in temperatures and textures is divine. You can also create a beautiful peanut butter chocolate swirl ice cream by drizzling extra melted peanut butter and chocolate sauce over the top just before serving. It’s also amazing sandwiched between two soft chocolate chip cookies for an extra special treat. If you’re looking for more unique dessert creations, you might enjoy our mini citrus cloud bites.
Nutrition Facts for Chocolate Peanut Butter Ice Cream
Here’s a breakdown of what you can expect in each serving of this delightful treat. Remember, these are estimates, as actual values can vary slightly based on the specific brands and types of ingredients you use. For more information on food nutrition, you can refer to resources like the USDA FoodData Central.
- Calories: Approximately 450-500
- Fat: 25-30g
- Saturated Fat: 15-20g
- Protein: 8-10g
- Carbohydrates: 50-60g
- Fiber: 3-5g
- Sugar: 45-55g
- Sodium: 150-200mg
Nutritional values are estimates and may vary based on specific ingredients used.
How to Store and Reheat Chocolate Peanut Butter Ice Cream
Proper storage is key to keeping your homemade chocolate peanut butter ice cream tasting amazing. Once it’s churned and ready, let it cool completely before transferring it to an airtight container. I find that pressing a piece of parchment paper or plastic wrap directly onto the surface of the ice cream before sealing the lid helps prevent those dreaded ice crystals, ensuring a smoother texture. For the best quality, consume your ice cream within 3-4 days if kept in the refrigerator, or up to 3 months in the freezer. This method ensures optimal taste and texture for your delicious dessert. For more tips on food storage, you can consult our terms of use which may contain relevant information.
Frequently Asked Questions About Chocolate Peanut Butter Ice Cream
What is Chocolate Peanut Butter Ice Cream?
Chocolate peanut butter ice cream is a classic dessert flavor that combines the rich, deep taste of chocolate with the creamy, slightly salty flavor of peanut butter. It’s a beloved combination because the two flavors complement each other so perfectly, creating a decadent and satisfying treat. This recipe makes it incredibly easy to create this popular flavor at home. If you’re interested in other breakfast or dessert bowls, check out our breakfast bowl recipes.
Why is Chocolate Peanut Butter Ice Cream popular?
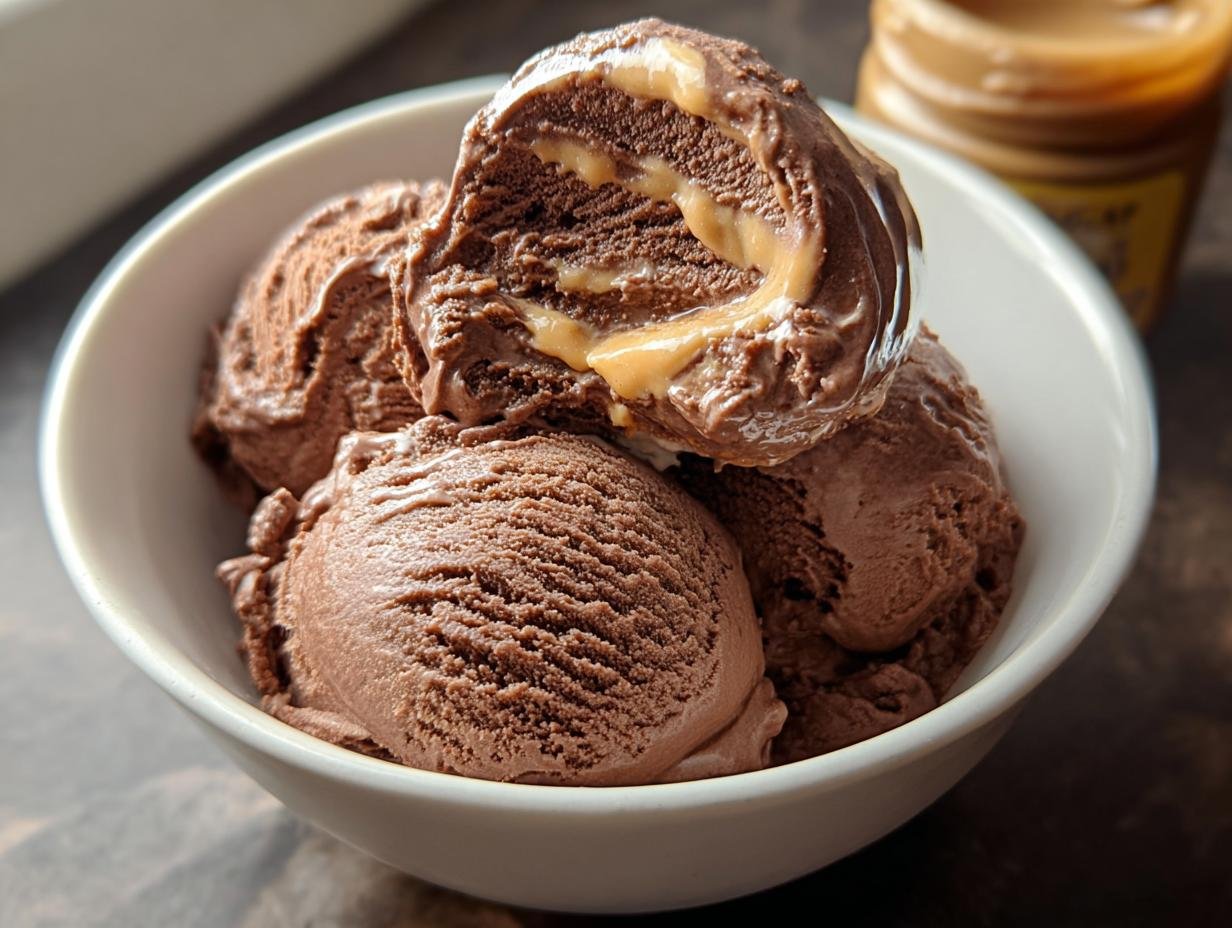
The popularity of chocolate peanut butter ice cream stems from the universally loved pairing of chocolate and peanut butter. It hits all the right notes: sweet, salty, rich, and creamy. This flavor is a go-to for many because it’s comforting, indulgent, and nostalgic. Plus, the visual appeal of the dark chocolate and creamy peanut butter swirls makes it irresistible. For other delightful recipes, consider our baby lemon impossible pies.
Can I make Chocolate Peanut Butter Ice Cream without an ice cream maker?
Yes, you absolutely can! This recipe is designed to be a chocolate peanut butter ice cream no churn wonder. While an ice cream maker yields the smoothest texture, you can achieve a fantastic result by pouring the chilled mixture into a freezer-safe container. Stir it vigorously every 30-45 minutes for the first 3-4 hours to break up ice crystals. This manual churning will give you a delicious homemade treat.
What are the best additions for Chocolate Peanut Butter Ice Cream?
While the base is amazing on its own, you can elevate your chocolate peanut butter ice cream even further! I love adding chunks of peanut butter cups, a swirl of extra melted peanut butter, or even some crunchy chocolate-covered pretzels for added texture. Mini chocolate chips or a drizzle of hot fudge sauce also make it extra special. For a savory option, you might enjoy our cheesy scalloped potatoes.
Variations of Chocolate Peanut Butter Ice Cream You Can Try
Once you’ve mastered the classic, don’t be afraid to get creative with this beloved flavor combination! There are tons of ways to customize your chocolate peanut butter ice cream.
- Vegan Chocolate Peanut Butter Ice Cream: For a completely plant-based version, swap the heavy cream and condensed milk for full-fat coconut milk (the kind from a can, chilled so the cream separates) and a vegan sweetened condensed milk alternative. You might need to adjust sweetness slightly, but the result is still incredibly creamy and delicious.
- Dairy-Free Chocolate Peanut Butter Ice Cream: Similar to the vegan option, using full-fat coconut milk or a cashew cream base will give you a wonderful dairy-free treat. Ensure your peanut butter and any add-ins are also dairy-free.
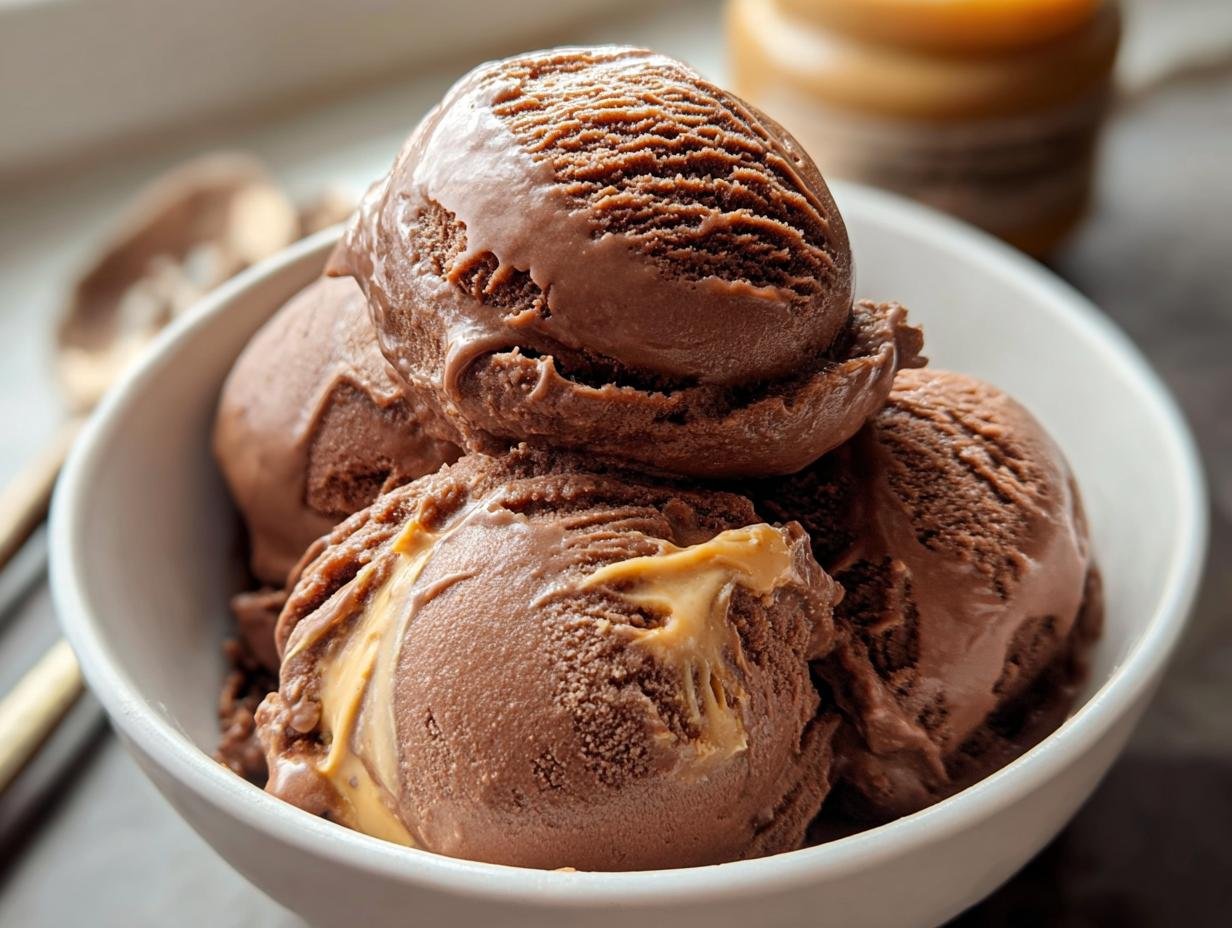
- Peanut Butter Chocolate Swirl Ice Cream: Want an extra punch of peanut butter? After churning, reserve a small amount of the base mixture and swirl it with extra melted peanut butter into the main batch. This creates beautiful ribbons of flavor throughout your ice cream.
- Spicy Chocolate Peanut Butter Ice Cream: For a grown-up twist, mix a pinch of cayenne pepper or a dash of chili powder into the cocoa mixture. It adds a subtle warmth that beautifully complements the rich chocolate and peanut butter.

Easy Chocolate Peanut Butter Ice Cream: 1 Goal
- Total Time: 20 minutes
- Yield: 6 servings 1x
- Diet: Vegetarian
Description
A simple and delicious homemade chocolate peanut butter ice cream recipe. This no-churn dessert combines rich chocolate with creamy peanut butter for a decadent treat.
Ingredients
- 2 cups heavy cream
- 1 can (14 oz) sweetened condensed milk
- 1/2 cup cocoa powder
- 1/2 cup peanut butter, melted
Instructions
- Prepare Your Cocoa Mixture: Combine 2 cups of heavy cream and 1/2 cup of cocoa powder in a medium saucepan. Stir this mixture gently over medium-low heat for about 5 minutes until smooth and chocolatey.
- Add Sweetened Condensed Milk: Gradually whisk in one can (14 oz) of sweetened condensed milk into your cocoa blend.
- Incorporate Melted Peanut Butter: Gently whisk in 1/2 cup of melted peanut butter until it blends seamlessly.
- Chill the Mixture: Remove the saucepan from heat and let the mixture cool. Refrigerate for 4-5 hours.
- Churn That Ice Cream: Pour the chilled mixture into your ice cream maker and churn according to the manufacturer’s instructions.
- Freeze and Savor: Transfer the ice cream into a container, add swirls or chunks if desired. Seal tightly and freeze for at least 3 hours.
Notes
- For a richer flavor, toast the cocoa powder before adding it.
- Ensure all ingredients are at room temperature for smooth blending.
- Chill the mixing bowl and whisk to speed up the whipping process.
- Add salt to taste to enhance flavors.
- Use a rubber spatula to scrape down sides for even mixing.
- Consider adding espresso powder for a coffee note.
- Avoid boiling the mixture to maintain creaminess.
- Store in an airtight container to prevent freezer odors.
- Press plastic wrap against the ice cream surface to prevent ice crystals.
- Consume within a week if stored in the fridge.
- Freeze at constant temperatures to prevent texture changes.
- Reheat gently in small batches.
- Label containers with the date.
- Ensure freezer is set to 0°F (-18°C) or below.
- Prep Time: 20 minutes
- Cook Time: 0 minutes
- Category: Desserts
- Method: No-Churn
- Cuisine: American
Nutrition
- Serving Size: 1 serving (approx. 1/2 cup)
- Calories: calculated based on ingredients
- Sugar: calculated based on ingredients
- Sodium: calculated based on ingredients
- Fat: calculated based on ingredients
- Saturated Fat: calculated based on ingredients
- Unsaturated Fat: calculated based on ingredients
- Trans Fat: calculated based on ingredients
- Carbohydrates: calculated based on ingredients
- Fiber: calculated based on ingredients
- Protein: calculated based on ingredients
- Cholesterol: calculated based on ingredients