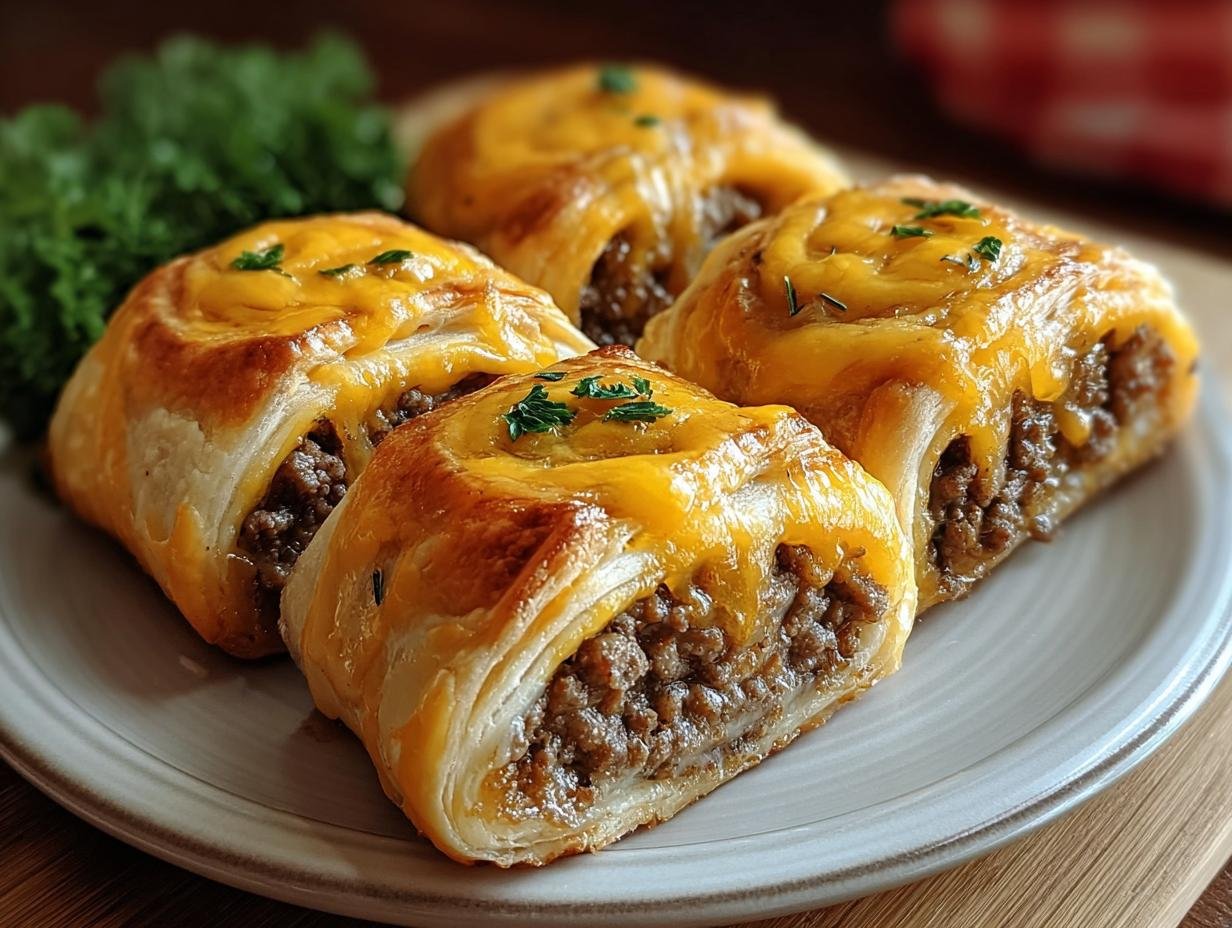
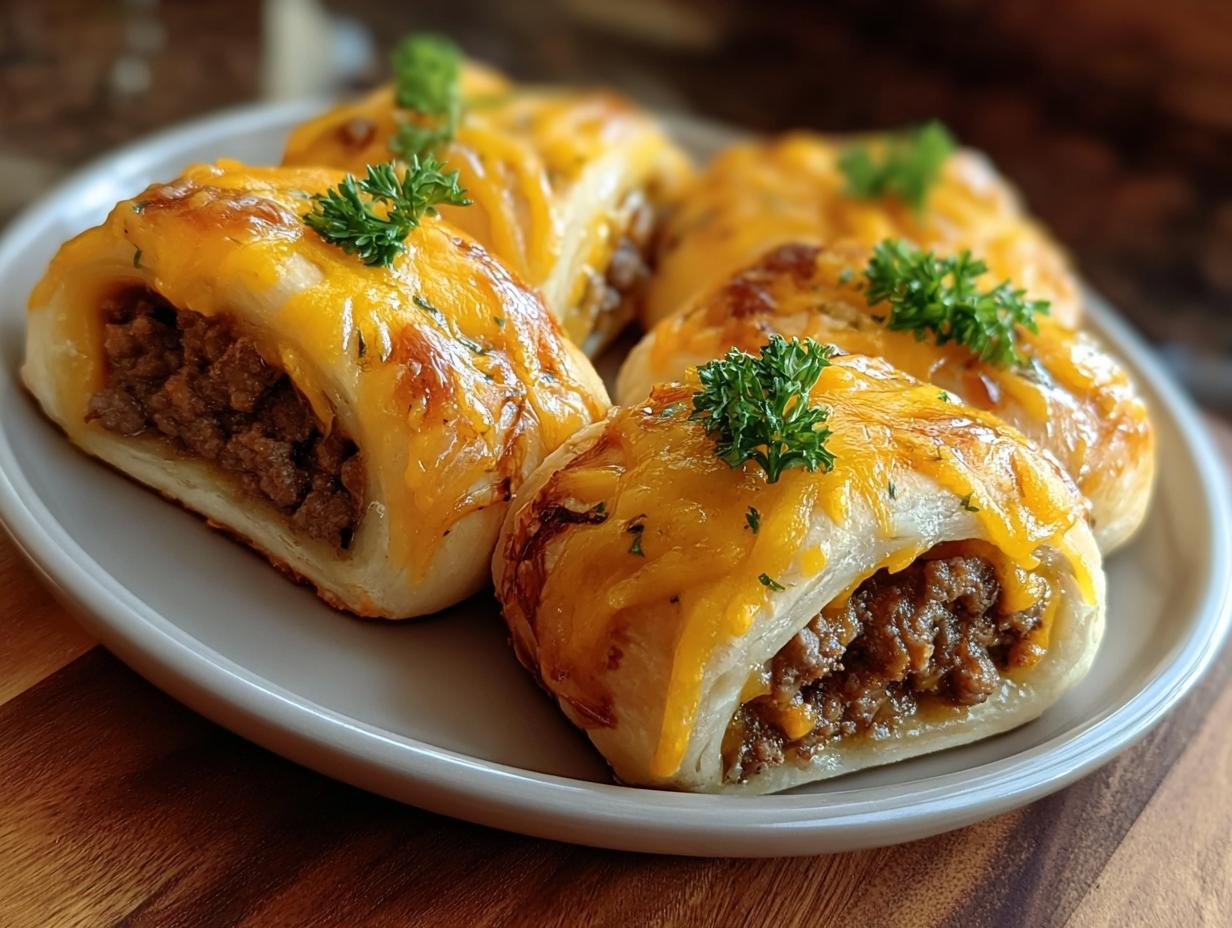
Cheeseburger Rollups have quickly become my go-to snack for game days and busy weeknights. I remember the first time I made them; the aroma of seasoned beef and garlic butter filled my kitchen, and my kids practically devoured them before they even cooled! This easy cheeseburger rollups recipe is so simple, even the little ones can help assemble them, making them perfect cheeseburger rollups for kids. The flaky crescent dough, savory ground beef, and gooey cheddar cheese create a flavor explosion that’s utterly irresistible. Let’s get cooking!
Why You’ll Love These Cheeseburger Rollups
Get ready to fall in love with these amazing bites! Here’s why these are a must-try:
- Incredible Flavor: They taste just like your favorite cheeseburger, but in a fun, handheld format.
- Super Quick Prep: You can whip these up in just 15 minutes, making them perfect for last-minute cravings.
- Family Favorite: Kids absolutely adore these, and they’re a fantastic way to get everyone in the kitchen.
- Budget-Friendly: Made with simple, common ingredients, these are easy on your wallet.
- Perfect for Parties: These cheeseburger pinwheels are always a hit at gatherings and game days.
- Versatile: Enjoy them as a snack, appetizer, or even a light meal.
- Easy to Customize: You can easily adapt these cheeseburger pinwheels to suit your taste.
Ingredients for Cheeseburger Rollups
Gathering the right ingredients is key to making these delicious cheeseburger rollups. The star of the show is the crescent dough, which bakes up wonderfully flaky and golden. Here’s everything you’ll need:
- 1 pound lean ground beef – provides the savory, classic cheeseburger flavor
- 1 teaspoon salt – enhances all the other flavors
- 1 teaspoon black pepper – adds a little kick
- 1 teaspoon garlic powder – for that essential garlic aroma
- 1 teaspoon smoked paprika – gives a subtle smoky depth
- 1 tablespoon Worcestershire sauce – adds a complex umami note
- 1 cup shredded cheddar cheese – melts into gooey perfection
- 1 can (8 oz) refrigerated crescent roll dough – the flaky base for our rollups
- 2 tablespoons unsalted butter – brushed on top for a rich finish
- 2 cloves garlic, minced – infused into the butter for extra flavor
- 2 tablespoons fresh parsley, chopped – for a pop of color and freshness
How to Make Cheeseburger Rollups
Making these delicious cheeseburger rollups is a breeze! Follow these simple steps for a guaranteed crowd-pleaser.
- Step 1: Preheat your oven to 375°F (190°C). Line a baking sheet with parchment paper for easy cleanup.
- Step 2: In a skillet over medium heat, cook the lean ground beef until it’s nicely browned. Make sure to drain any excess fat so your rollups aren’t greasy.
- Step 3: Season the beef with salt, black pepper, garlic powder, smoked paprika, and Worcestershire sauce. Stir it all together and cook for another minute or two until the spices are fragrant. Remove the skillet from the heat. This seasoned ground beef is the heart of your rollups!
- Step 4: Carefully unroll the refrigerated crescent roll dough onto a clean, lightly floured surface. You should have triangles ready to be filled.
- Step 5: Spoon the seasoned cheeseburger rollups with ground beef mixture evenly onto the wide end of each dough triangle. Don’t overfill, or they might spill out during baking. Top generously with the shredded cheddar cheese.
- Step 6: Roll each dough triangle tightly, starting from the wide end and rolling towards the pointed tip. Gently pinch the seams to seal the filling inside. Place each rolled-up cheeseburger seam-side down on your prepared baking sheet.
- Step 7: In a small bowl, melt the unsalted butter. Stir in the minced garlic and chopped fresh parsley. Brush this fragrant garlic butter mixture evenly over the tops of each rollup. This step adds an amazing aroma and golden crust.
- Step 8: Bake for 12-15 minutes, or until the rollups are beautifully golden brown and the cheddar cheese is melted and bubbling. Keep an eye on them so they don’t burn!
- Step 9: Let them cool for just a couple of minutes before serving. They are best enjoyed warm, perhaps with some mustard or ketchup for dipping.

Pro Tips for the Best Cheeseburger Rollups
Want to elevate your cheeseburger rollups game? I’ve picked up a few tricks over the years that make all the difference:
- Make sure your ground beef is cooked and drained thoroughly before adding it to the dough. Excess grease can make the crescent dough soggy.
- Don’t overstuff the dough triangles. Too much filling will cause the rollups to burst open during baking, making them messy.
- Brush the tops generously with the garlic butter mixture right before baking. This creates that irresistible golden-brown, flavorful crust we all love.
- Let the rollups sit for a minute or two after they come out of the oven before slicing or serving. This allows the cheese to set slightly.
What’s the secret to perfect cheeseburger rollups?
The secret lies in the garlic butter brush and not overfilling! That butter mixture creates a fantastic golden crust, and keeping the filling manageable ensures each bite is perfectly balanced, making them a delightful cheeseburger rollups appetizer.
Can I make cheeseburger rollups ahead of time?
Yes, you can assemble them up to a day in advance! Prepare the filling and roll them up in the dough, but don’t brush with garlic butter yet. Store them seam-side down on a parchment-lined baking sheet, covered tightly with plastic wrap, in the refrigerator.
How do I avoid common mistakes with cheeseburger rollups?
The most common mistake is overfilling, which leads to leakage. Another is not draining the beef fat properly, resulting in a greasy texture. Also, ensure your oven is fully preheated for even baking and that golden finish. For more baking tips, check out this guide on flour properties.
Best Ways to Serve Cheeseburger Rollups
These versatile cheeseburger rollups are fantastic on their own, but they truly shine when paired with the right accompaniments. For a classic game-day spread, I love serving them with a variety of dipping sauces like tangy mustard, sweet ketchup, or even a spicy sriracha mayo. They’re also delicious alongside a crunchy side dish, like potato chips or a simple coleslaw. If you’re looking for a more substantial meal, these cheeseburger rollups with cheddar cheese pair wonderfully with a fresh green salad or some sweet potato fries. They’re always a hit, no matter how you serve them!
Nutrition Facts for Cheeseburger Rollups
Here’s a look at the nutritional breakdown for these tasty bites, based on a single serving:
- Calories: 250 kcal
- Fat: 18 g
- Saturated Fat: 9 g
- Protein: 15 g
- Carbohydrates: 12 g
- Fiber: 1 g
- Sugar: 1 g
- Sodium: 450 mg
Nutritional values are estimates and may vary based on specific ingredients used.
How to Store and Reheat Cheeseburger Rollups
Once your delicious cheeseburger rollups are baked and enjoyed, you might have a few leftovers – lucky you! Make sure to let them cool completely before storing them. I usually pop them onto a wire rack for about 20 minutes. For fridge storage, place any leftover cheeseburger rollups bake in an airtight container or wrap them tightly in plastic wrap. They’ll stay fresh and tasty for about 3 to 4 days. If you want to keep them even longer, you can freeze them for up to 2 months! Just wrap each one securely in plastic wrap, then aluminum foil, and pop them into a freezer-safe bag.
Reheating is super simple! To bring back that lovely crispness, I recommend placing them on a baking sheet and warming them in a preheated oven at 350°F (175°C) for about 10-15 minutes. This method helps them regain their golden-brown perfection. You can also reheat them in an air fryer or even briefly in a microwave if you’re in a real hurry, though the oven is best for texture. For more reheating tips, consider checking out this guide on reheating leftovers.
Frequently Asked Questions About Cheeseburger Rollups
Can I use different types of cheese in my cheeseburger rollups?
Absolutely! While cheddar is classic, feel free to experiment. Monterey Jack, Pepper Jack for a little heat, or even a blend of mozzarella and Swiss work wonderfully. Just make sure the cheese melts well for those gooey bites.
What’s the best way to make simple cheeseburger rollups spicy?
For a kick, add a pinch of cayenne pepper or red pepper flakes to the ground beef mixture. You could also mix in some chopped jalapeños or a tablespoon of your favorite hot sauce. It makes these already amazing rollups even more exciting!
Can I make the filling for cheeseburger rollups ahead of time?
Yes! You can cook the seasoned ground beef filling and store it in an airtight container in the refrigerator for up to 2 days. This makes assembling the cheeseburger rollups even quicker when you’re ready to bake them. Just reheat the filling slightly before spooning it onto the dough.
What dipping sauces go well with cheeseburger rollups?
Classic choices like ketchup and mustard are always a hit. For something a little different, try a comeback sauce, a creamy ranch, or even a spicy aioli. They’re perfect for dipping these savory bites!
Variations of Cheeseburger Rollups You Can Try
Once you’ve mastered the classic, get ready to explore some fun twists on these beloved bites! These variations offer something for everyone, whether you’re looking for a dietary swap or a flavor adventure.
- Spicy Cheeseburger Rollups: Amp up the heat by adding a teaspoon of red pepper flakes or some finely diced jalapeños to the beef mixture. A dash of your favorite hot sauce in the filling also works wonders for these spicy cheeseburger rollups.
- Cheeseburger Rollups with Bacon: Craving that irresistible smoky flavor? Crumble in some cooked, crispy bacon bits along with the ground beef and cheese. It adds an extra layer of savory deliciousness that’s hard to beat.
- Turkey Cheeseburger Rollups: For a lighter option, swap the ground beef for lean ground turkey. The flavor profile is still fantastic, and it makes for a great alternative if you’re looking to reduce fat content.
- Air Fryer Cheeseburger Rollups: Short on time? You can also make these in your air fryer! Arrange them in a single layer (you may need to work in batches) and cook at 375°F (190°C) for about 8-10 minutes, or until golden brown and heated through.

Cheeseburger Rollups: Easy 15-Min Game Day Treat
- Total Time: 30 minutes
- Yield: 8 rollups 1x
- Diet: Vegetarian
Description
Cheeseburger Rollups are a quick and delicious game-day snack. These easy-to-make rollups feature seasoned ground beef and melted cheddar cheese wrapped in flaky crescent dough, brushed with garlic butter, and baked to golden perfection. They are the ultimate handheld treat for any gathering.
Ingredients
- 1 pound Lean Ground Beef
- 1 teaspoon Salt
- 1 teaspoon Black Pepper
- 1 teaspoon Garlic Powder
- 1 teaspoon Smoked Paprika
- 1 tablespoon Worcestershire Sauce
- 1 cup Shredded Cheddar Cheese
- 1 can Refrigerated Crescent Roll Dough
- 2 tablespoons Unsalted Butter
- 2 cloves Garlic (minced)
- 2 tablespoons Fresh Parsley (chopped)
- Optional Additions: Pickles, Jalapeños, Different Cheeses (Mozzarella, Swiss), Bacon
- For Dipping Sauces: Mustard, Ketchup
Instructions
- Preheat your oven to 375°F (190°C). Line a baking sheet with parchment paper.
- In a skillet over medium heat, cook the lean ground beef until browned. Drain any excess fat.
- Season the beef with salt, black pepper, garlic powder, smoked paprika, and Worcestershire sauce. Cook for 1-2 minutes more, then remove from heat.
- Unroll the refrigerated crescent roll dough on a clean surface.
- Spoon the seasoned beef mixture onto the wide end of each dough triangle. Top with shredded cheddar cheese.
- Roll the dough from the wide end to the pointed tip, ensuring the filling is enclosed. Place each rollup seam-side down on the prepared baking sheet.
- In a small bowl, melt the unsalted butter with minced garlic. Stir in chopped parsley. Brush this mixture over the tops of each rollup.
- Bake for 12-15 minutes, or until the rollups are golden brown and the cheese is bubbling.
- Serve warm with your favorite dipping sauces.
Notes
- Serve with a side of crispy potato chips for added crunch.
- Store leftovers in an airtight container in the refrigerator for up to 3 days.
- For longer storage, wrap tightly in plastic wrap and freeze in a freezer-safe bag for up to 2 months.
- Reheat in the oven at 350°F (175°C) for 10-15 minutes until heated through.
- Dairy-Free: Use dairy-free cheese alternatives.
- Spicy Option: Add chopped jalapeños or hot sauce to the beef mixture.
- Turkey Substitute: Use ground turkey instead of ground beef for a leaner version.
- Bacon Lovers: Add crumbled cooked bacon to the filling.
- Veggie Delight: Replace beef with sautéed mushrooms, onions, and bell peppers.
- Herb Infusion: Mix fresh herbs like thyme or oregano into the garlic butter.
- Holiday Twist: Use cranberry sauce and cream cheese instead of beef filling for a festive option.
- Prep Time: 15 minutes
- Cook Time: 15 minutes
- Category: Appetizers
- Method: Baking
- Cuisine: American
Nutrition
- Serving Size: 1 rollup
- Calories: 250 kcal
- Sugar: 1 g
- Sodium: 450 mg
- Fat: 18 g
- Saturated Fat: 9 g
- Carbohydrates: 12 g
- Fiber: 1 g
- Protein: 15 g
- Cholesterol: 50 mg