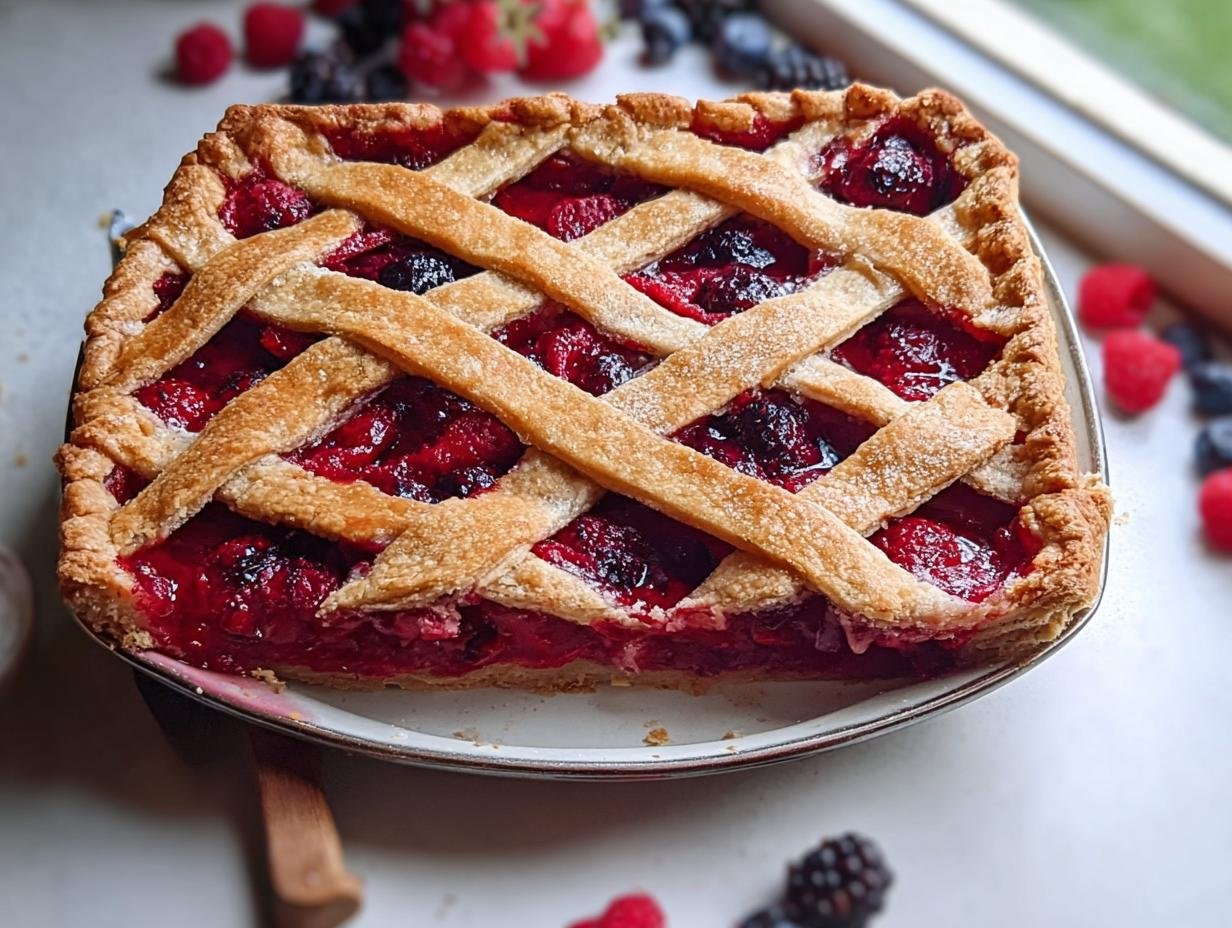
Berry slab pie has always been my go-to for summer potlucks, especially when I need to feed a crowd. It’s essentially a giant, rustic pie baked in a sheet pan, making cleanup a breeze and serving even easier. I remember one scorching July afternoon, my neighbor brought over this incredible mixed berry slab pie, and the sweet, tart aroma of baked berries and flaky crust filled my whole kitchen. It was so delicious and surprisingly simple to make, which is why I’m sharing this easy berry slab pie recipe with you. Let’s get cooking!
Why You’ll Love This Berry Slab Pie
This berry slab pie is a guaranteed crowd-pleaser for so many reasons! Here’s why you’ll be making it again and again:
- Incredible Flavor: The combination of sweet blueberries and slightly tart strawberries creates a perfectly balanced, delicious berry filling.
- Quick Prep Time: With only 30 minutes of prep, you can get this simple berry slab pie into the oven without a fuss.
- Family-Friendly: It’s a hit with kids and adults alike, offering a taste of summer that everyone enjoys.
- Budget-Friendly: Using seasonal berries and store-bought crust makes this a cost-effective way to serve dessert.
- Easy Cleanup: Baking in a sheet pan means less mess and more time enjoying your guests.
- Versatile: It’s a great way to use up fresh berries from the farmer’s market or your garden.
- Simple Berry Slab Pie Perfection: You get all the comfort of homemade pie without the fuss of a traditional double-crust.
Ingredients for Your Homemade Berry Slab Pie
Gathering your ingredients is the first step to creating this delightful mixed berry slab pie. You’ll need:
- 2 pieces pie crusts (store-bought or homemade) – for the bottom, providing that essential flaky base.
- 1 piece pie crust for the top – to create a beautiful lattice or decorative topping.
- 2 pints fresh blueberries – these add a burst of sweetness and vibrant color.
- 2 lbs strawberries, hulled and diced – dicing them ensures they cook evenly within the filling.
- 6 tablespoons corn starch – this is key to thickening the berry juices and preventing a watery pie.
- 1 tablespoon lemon juice – it brightens the berry flavors and adds a touch of tartness.
- 3/4 cup granulated sugar – adjust this based on your berries’ sweetness; it balances the tartness perfectly.
- 1/2 teaspoon kosher salt – a little salt enhances all the other flavors, making the berries shine.
- 2 tablespoons unsalted butter, cubed – these little pockets of butter melt into the filling, adding richness.
- 1 egg – beaten with water for an egg wash, this gives the top crust a beautiful golden sheen.
- 1 tablespoon water – mixed with the egg for the wash.
How to Make a Berry Slab Pie Recipe
Let’s get this delicious berry slab pie into the oven! Follow these simple steps for a perfect fruit slab pie recipe.
- Step 1: Begin by preheating your oven to 375°F (190°C). This ensures a perfectly baked crust and bubbly filling.
- Step 2: Roll out two pieces of pie crust to fit a large baking sheet or your slab pie pan. Trim any excess dough from the edges.
- Step 3: Line the bottom crust with parchment paper and fill it with pie weights or dried beans. Blind baking the bottom crust prevents it from getting soggy. Bake for about 10 minutes.
- Step 4: Carefully remove the pie weights and parchment paper. Continue baking for another 5-7 minutes until the bottom crust is lightly golden. Let it cool completely before adding the filling.
- Step 5: While the bottom crust cools, rinse your fresh blueberries and dice the hulled strawberries.
- Step 6: In a large bowl, combine the prepared berries with cornstarch, lemon juice, granulated sugar, and kosher salt. Toss gently until the berries are evenly coated. This mixture will become a luscious, thickened filling as you bake.
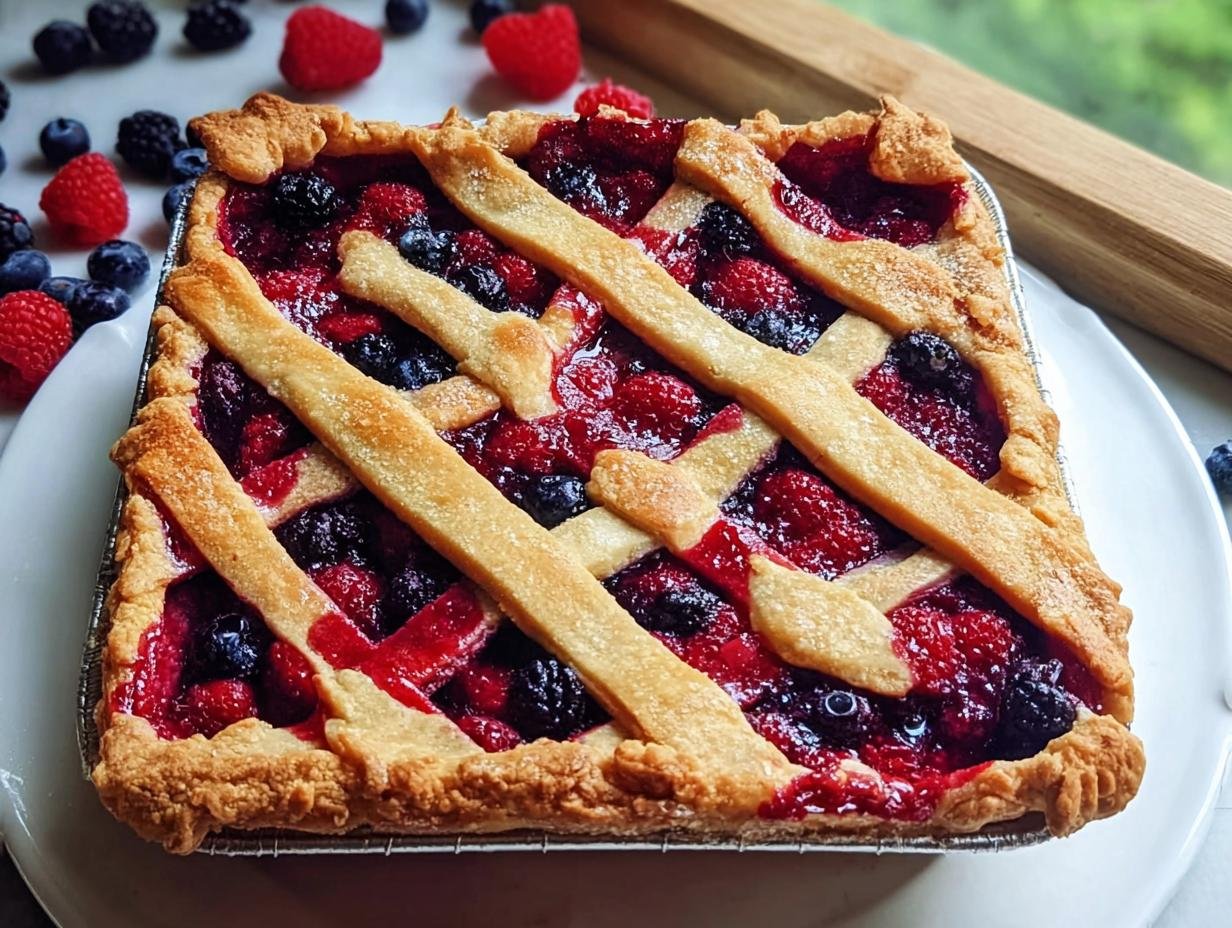
- Step 7: Roll out the remaining piece of pie crust. You can cut it into strips for a classic lattice or use cookie cutters for decorative shapes.
- Step 8: Brush the cooled bottom crust with the egg wash – it’s just one egg mixed with one tablespoon of water. This helps the lattice topping adhere and gives it a beautiful golden sheen.
- Step 9: Pour the sweet and tart berry mixture evenly onto the prepared bottom crust.
- Step 10: Dot the berry filling with the cubed unsalted butter. These little pockets of butter add a wonderful richness.
- Step 11: Arrange your lattice crust strips or decorative shapes over the berry filling.
- Step 12: Now it’s time for how to bake a berry slab pie! Place the pie in the preheated oven and bake for 50 minutes. You’re looking for a golden brown crust and a bubbling, thickened berry filling. If the edges start browning too quickly, loosely tent them with foil.
- Step 13: Once baked, remove the pie from the oven and let it cool on a wire rack for at least 2 hours. This cooling time is crucial for the filling to set properly, ensuring clean slices. Enjoy how to bake a berry slab pie successfully!
Pro Tips for the Best Berry Slab Pie
Want to take your berry slab pie from good to absolutely amazing? I’ve learned a few tricks over the years that make all the difference, ensuring a perfect result every time. These tips will help you achieve that beautifully baked, flavor-packed dessert that everyone will rave about.
- For a truly classic berry slab pie, don’t skip blind baking the bottom crust. This step is crucial for preventing a soggy bottom, especially with juicy berry fillings.
- Using a mix of berries, like blueberries and strawberries, adds complexity and balances the sweetness and tartness beautifully. Adjust the sugar based on how sweet your berries are naturally.
- Letting the pie cool completely is non-negotiable. Seriously, the filling needs at least two hours to set properly so you can get clean, beautiful slices.
What’s the secret to perfect berry slab pie?
The secret to a truly perfect berry slab pie lies in the pre-baking of the bottom crust to prevent sogginess, and then allowing ample cooling time for the filling to set. This ensures a crisp base and perfectly sliceable fruit.
Can I make berry slab pie ahead of time?
Yes, you can totally prep components ahead! You can mix the berry filling up to a day in advance and store it covered in the fridge. Assemble the pie just before baking for the freshest taste, or bake it and store it covered at room temperature.
How do I avoid common mistakes with berry slab pie?
A common mistake is a soggy bottom crust, which you can avoid by blind-baking. Another pitfall is over-baking, which can dry out the crust; watch for a bubbling filling and golden edges. Lastly, don’t cut into it too soon – patience is key for setting!

Best Ways to Serve Your Sheet Pan Berry Pie
This delicious berry slab pie is incredibly versatile, making it perfect for any occasion, especially when you need a dessert that can serve a crowd. I love serving it warm, straight from the oven, with a generous scoop of creamy vanilla ice cream. The contrast of hot, bubbly berry filling and cold, smooth ice cream is simply divine. Another favorite way to enjoy it is with a dollop of freshly whipped cream and a sprinkle of mint for a refreshing touch. For larger gatherings, consider pairing slices of this berry pie for a crowd with a light, zesty lemon sorbet or a simple shortbread cookie to complement the sweet and tart fruit flavors.
Nutrition Facts for Berry Slab Pie
Here’s a look at the estimated nutritional breakdown per slice of this delightful berry slab pie:
- Calories: 250 kcal
- Fat: 12g
- Saturated Fat: 7g
- Protein: 3g
- Carbohydrates: 35g
- Fiber: 2g
- Sugar: 15g
- Sodium: 150mg
Nutritional values are estimates and may vary based on specific ingredients used.
How to Store and Reheat Your Large Batch Berry Pie
Properly storing your delicious fruit slab pie recipe is key to enjoying it later. Once your masterpiece has completely cooled – and I mean *completely* cooled, usually about 2-3 hours – you can store it. For short-term storage, cover the pie tightly with plastic wrap or aluminum foil, or place it in an airtight container. It should stay fresh at room temperature for up to 2 days, or in the refrigerator for 3-4 days. If you want to keep it even longer, freezing is a great option. Wrap the cooled pie securely in plastic wrap, then in aluminum foil, and it can be frozen for up to 3 months. To reheat, if it’s from the fridge, a brief 10-15 minutes in a 300°F (150°C) oven will warm it through. If reheating from frozen, bake it at the same temperature for about 25-30 minutes, or until heated through and the crust is crisp again.
Frequently Asked Questions About Berry Slab Pie
What makes a berry slab pie different from a regular pie?
The main difference is the size and shape! A berry slab pie is baked in a large rectangular baking pan or sheet pan, making it much larger than a traditional round pie. This means you can serve more people easily, making it perfect for gatherings. It’s a fantastic way to enjoy a classic fruit pie in a more convenient, crowd-pleasing format.
Can I use frozen berries in my easy berry slab pie?
Absolutely! You can definitely use frozen berries for an easy berry slab pie, but there are a couple of things to keep in mind. Make sure not to thaw them completely before mixing them with the sugar, cornstarch, and other filling ingredients. You might need to increase the cornstarch slightly to help absorb the extra moisture from frozen berries, and potentially add a few extra minutes to the baking time. The result will still be delicious!
How do I get a crispy crust on my berry slab pie?
Getting a crispy crust is all about preventing moisture from making it soggy. For this specific berry slab pie recipe, blind baking the bottom crust first is key. This pre-bakes the dough, giving it a head start. Also, ensure your oven is fully preheated and bake at the correct temperature. If the edges brown too quickly during baking, covering them with foil helps prevent burning while the center finishes cooking.
Is this a good fruit slab pie recipe for beginners?
Yes, this is a wonderful fruit slab pie recipe for beginners! It uses straightforward techniques, and the sheet pan format is very forgiving. Using store-bought pie crust makes it even simpler. The instructions are clear, and the resulting pie is always impressive, even if you don’t have a lot of baking experience. You’ll be amazed at how delicious homemade can be!
Variations of Berry Slab Pie You Can Try
Once you’ve mastered the classic, you’ll be excited to know there are so many ways to switch up this delightful berry slab pie! It’s so adaptable, making it easy to create a new favorite. For a quicker version, try using pre-made pie crusts and a store-bought crumble topping instead of a lattice for a truly quick berry slab pie experience. If you’re looking for a healthier twist, consider using whole wheat pastry flour for your crust and reducing the sugar slightly, relying on the natural sweetness of the berries themselves. You could also experiment with different berry combinations, like adding raspberries or blackberries, or even incorporating a touch of almond extract into the filling for a unique flavor profile.
Print
Berry Slab Pie: Delicious 30-Min Prep Perfection
- Total Time: 3 hours 20 minutes
- Yield: 16 slices 1x
- Diet: Vegetarian
Description
A simple and delicious berry slab pie, perfect for summer gatherings and easy to make. This recipe features a flaky crust filled with a sweet and tart mix of strawberries and blueberries.
Ingredients
- 2 pieces pie crusts (store-bought or homemade) for the bottom
- 1 piece pie crust for the top
- 2 pints fresh blueberries
- 2 lbs strawberries, hulled and diced
- 6 tablespoons corn starch
- 1 tablespoon lemon juice
- 3/4 cup granulated sugar
- 1/2 teaspoon kosher salt
- 2 tablespoons unsalted butter, cubed
- 1 egg
- 1 tablespoon water
Instructions
- Preheat your oven to 375°F (190°C).
- Roll out 2 pie crusts to fit a large baking sheet or slab pie pan, trimming the edges as needed.
- Line the bottom crust with parchment paper and fill with pie weights. Bake for 10 minutes.
- Remove pie weights and bake for another 5-7 minutes until lightly golden. Let cool completely.
- Rinse and dice the strawberries and blueberries.
- In a large bowl, mix the berries with lemon juice, cornstarch, sugar, and salt until well combined.
- Roll out the remaining pie crust and cut into strips or shapes for a lattice design.
- Brush the bottom crust with the egg wash (egg mixed with water).
- Pour the berry mixture onto the bottom crust.
- Dot the filling with cubed butter.
- Arrange the lattice crust design over the filling.
- Bake for 50 minutes, or until the crust is golden brown and the filling is bubbling. Cover edges with foil if browning too quickly.
- Allow the pie to cool for at least 2 hours before slicing.
Notes
- Serve warm with vanilla ice cream or whipped cream.
- Ensure all ingredients are fresh for the best flavor.
- Adjust sugar based on the sweetness of your berries.
- Cooling time is crucial for the filling to set properly.
- Prep Time: 30 minutes
- Cook Time: 50 minutes
- Category: Desserts
- Method: Baking
- Cuisine: American
Nutrition
- Serving Size: 1 slice
- Calories: 250 kcal
- Sugar: 15 g
- Sodium: 150 mg
- Fat: 12 g
- Saturated Fat: 7 g
- Unsaturated Fat: 5 g
- Trans Fat: 0 g
- Carbohydrates: 35 g
- Fiber: 2 g
- Protein: 3 g
- Cholesterol: 50 mg